












Water valve boxes are small surface features with an outsized role in the reliability of the distribution system. When crews cannot quickly locate, open, or reach a buried valve, a routine repair can become a longer outage or a more difficult emergency response. Purpose-built equipment can help when soil, gravel, water, and compacted debris obstruct access. For example, hydro excavation vacuum equipment from Hurco Technologies, Inc., a Harrisburg, South Dakota, manufacturer of valve maintenance and underground utility tools, is designed as part of an all-in-one valve and vacuum system that clears valve box debris and can assist with misaligned boxes. That makes it a relevant option for public works departments and utility contractors throughout South Dakota and the broader Midwest.
A dependable maintenance routine does not start when a main breaks. It starts with accurate asset records, safe work practices, regular inspections, and a clear plan to correct access problems before they delay valve operation. The following checklist gives water utilities a practical framework for managing valve boxes.
Why Valve Box Maintenance Deserves a Routine
Valve boxes provide surface access to buried shutoff valves that isolate sections of a water system. A cover hidden beneath asphalt, turf, mud, snow, or sediment may keep a crew from reaching the operating nut when time matters most. Routine checks help identify blocked, damaged, or shifted boxes, allowing repairs to be scheduled rather than handled under emergency conditions.
Valve access should also be managed as part of a broader asset-management program. Useful records connect the valve location, condition, maintenance history, and follow-up needs, helping supervisors prioritize routes and recurring trouble spots. The EPA’s asset management resources for water systems provide useful background for utilities seeking to build a more organized approach to infrastructure records and maintenance planning.
Common Problems Around Valve Boxes
Most valve box problems begin with ordinary field conditions. Soil settles into the opening, loose gravel moves under traffic, and leaves or grass clippings collect beneath the lid. Flooding can leave standing water and mud. Freeze-thaw cycles can shift covers or crack surrounding pavement, while landscaping and road work may bury markings or leave the box out of alignment.
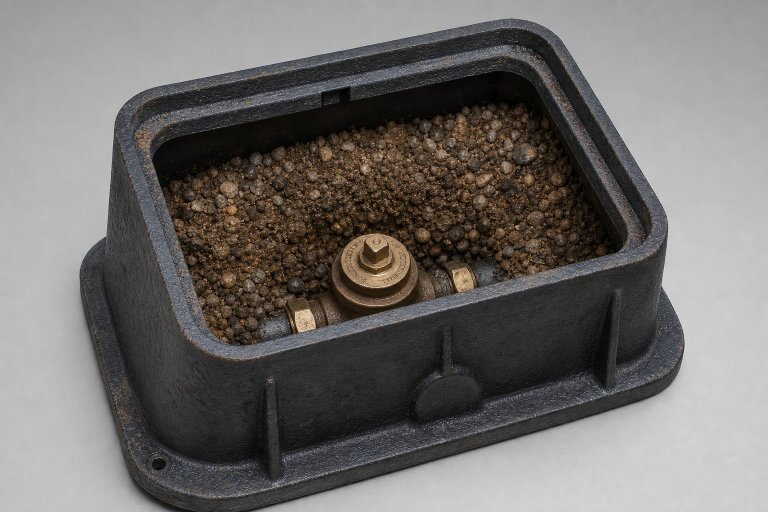
Warning signs include a rocking or cracked cover, corrosion, a box that sits too low or too high, missing identification, and an operating nut that cannot be reached. For example, a crew may find the correct cover but discover that compacted material has filled the lower section of the box. The valve is present, but the stem cannot be engaged safely until the obstruction is removed.
Start With a Safe Site Assessment
Before opening a valve box, assess traffic, nearby equipment, weather, unstable soil, standing water, overhead hazards, and pedestrian exposure. Establish a visible work zone with the appropriate cones, signs, barriers, and traffic control procedures. Confirm the asset location using records and surface markings before disturbing the ground.
If digging or excavation may be needed, identify underground utilities and follow the utility’s excavation procedures. Crews should also review OSHA trenching and excavation safety guidance, particularly when a blocked or damaged box requires exposing deeper components. Cave-in protection, safe access and exit, inspections, and water management become essential when work goes beyond surface-level cleaning.
Use a Step-by-Step Valve Box Inspection
- Confirm the valve location with maps, GIS data, work orders, and visible markings.
- Inspect the cover for cracking, movement, corrosion, poor fit, and trip hazards.
- Clear loose surface material around the opening without damaging pavement or landscaping.
- Check inside the box for mud, water, roots, ice, gravel, and compacted debris.
- Look for a shifted, crushed, or misaligned box that prevents straight access.
- Verify that the operating nut and valve stem are reachable and identifiable.
- Document the condition with notes, photographs, and the valve’s asset number.
- Report repair needs, including excavation, box replacement, traffic control, or valve investigation.
Match the Cleaning Method to the Condition
Light debris may only require hand tools and careful brushing. Wet soil, deep mud, or compacted material may call for water-assisted loosening and vacuum removal. The objective is controlled access, not speed alone. Avoid driving tools against a fragile cover, valve stem, or box wall, since damage can turn a simple maintenance visit into a repair project.
Equipment selection should reflect local conditions. Small systems may value portability and simple setup. Larger municipalities may need more tank capacity, hose reach, route efficiency, and equipment that supports repeated use. Contractors may prioritize flexibility across a range of box sizes and job sites. Compare water use, power source, noise, service access, cleanup requirements, and the ability to work safely near traffic.
Connect Cleaning With Valve Exercising
Cleaning the box is only one part of a complete valve maintenance visit. Once access is clear, crews can confirm the valve position, intended direction of travel, operating resistance, and final status. Follow written utility procedures and manufacturer guidance, and avoid rapid operation that could contribute to pressure changes in the distribution system.
The work record should state whether the valve was operable, partially obstructed, difficult to operate, damaged, or referred for follow-up. This distinction matters because a clean box does not necessarily mean the valve itself is ready for emergency isolation.
Build Better Records
Consistent documentation helps utilities turn isolated observations into a usable maintenance plan. A GIS platform or mobile work-order system can simplify updates, but a standardized paper form is better than inconsistent notes. Photos are especially useful for comparing pavement damage, settling, recurring water, and box alignment over time.
Include These Items in Every Record
- Asset identification number and street or facility location
- Valve type, when known, and the box and cover condition
- Debris, water, roots, ice, or access obstructions found
- Valve operating result and final valve position
- Photographs, follow-up work, and repair priority
- Date, crew members, and relevant weather conditions
Crew Safety Checks Before Leaving
Before moving to the next location, make sure the cover is seated correctly, and the finished surface does not create a trip, vehicle, or pedestrian hazard. Remove hoses, tools, loose debris, and temporary traffic-control materials when appropriate. Update the work order promptly and schedule any repairs that could not be completed during the visit.
Frequently Asked Questions
How often should water utilities inspect valve boxes?
Inspection frequency should reflect system size, valve criticality, local weather, road activity, historical access problems, and the utility’s written maintenance plan.
What if a valve box is full of water?
Assess the area safely, consider drainage and contamination concerns, and determine whether pumping, cleaning, excavation, or additional support is needed before attempting to operate the valve.
When does a blocked valve box require excavation?
Excavation may be necessary when the box is severely misaligned, crushed, buried, unstable, or unable to provide safe access to the valve stem.
Make Access Part of the Maintenance Plan
Reliable valve maintenance begins with a valve that crews can locate, reach, inspect, and operate safely. A repeatable checklist turns minor access issues into planned repairs instead of emergency delays. Combining trained crews, accurate records, safe work zones, and equipment suited to local conditions gives utilities a stronger foundation for dependable water service.