


Building a Custom Gaming PC from Scratch
Imagine a gaming setup that perfectly matches your vision, offers peak performance, and reflects your unique style. In April 2026, technology continues to push boundaries, and the realm of DIY (Do-It-Yourself) tech and gaming hardware is more exciting than ever. Gone are the days when custom builds were only for tech gurus. Today, with accessible components and a thriving maker community, anyone can create their ideal digital experience.
Building your own tech isn’t just about saving money; it’s about unlocking unparalleled customization, optimizing performance to your exact needs, and gaining a deep understanding of the machines we use daily. It’s a journey of creativity and innovation, where you can bring your most ambitious gaming dreams to life. For those interested in Creative DIY gaming hardware, the possibilities are truly endless.
This extensive guide will take you through every essential step. We will explore everything from assembling a powerful custom gaming PC to crafting portable retro consoles and even delving into advanced projects like full-body VR trackers. We’ll cover how to choose the right components, find affordable parts, master necessary skills, and troubleshoot common issues.
Building a custom gaming PC is arguably the most popular entry point into DIY tech. It offers a unique blend of performance, personalization, and the satisfaction of knowing you assembled every component. Unlike pre-built systems, a custom PC allows for precise control over aesthetics, performance, and future upgrade paths. It’s a journey that culminates in a machine perfectly tailored to your gaming habits and budget. For comprehensive resources on DIY custom PC builds, many online communities and guides can provide foundational knowledge.
The process involves careful component selection, ensuring compatibility, and meticulous assembly. Beyond just putting parts together, considerations like thermal management, efficient cable routing, and optimal airflow are crucial for sustained performance and longevity.
When considering the financial aspect, building a PC often provides better value for money compared to purchasing a pre-built system with similar specifications. While entry-level DIY gaming PCs can be constructed for around $800-$1000, high-end systems designed for uncompromising performance can exceed $2000. This flexibility in budget allows builders to scale their investment according to their needs and aspirations.
Here’s a general comparison of typical specifications for entry-level versus high-end DIY gaming PCs in April 2026:
Component Entry-Level DIY Gaming PC ($800-$1000) High-End DIY Gaming PC ($2000+) CPU Mid-range Intel Core i5 or AMD Ryzen 5 (e.g., 12th/13th Gen, 7000 Series) High-end Intel Core i7/i9 or AMD Ryzen 7/9 (e.g., 14th Gen, 8000/9000 Series) GPU NVIDIA RTX 3060/4060 or AMD RX 6700/7700 XT NVIDIA RTX 4080/4090 or AMD RX 7900 XT/XTX RAM 16GB DDR4 (3200-3600MHz) 32GB DDR5/DDR6 (6000MHz+) Storage 1TB NVMe SSD (PCIe Gen3/Gen4) 2TB+ NVMe SSD (PCIe Gen5) + Optional HDD for bulk storage Motherboard B-series chipset (e.g., B660/B760, B550/B650) Z-series chipset (e.g., Z790/Z890) or X-series (e.g., X670E) PSU 650W-750W 80+ Bronze/Gold 850W-1200W 80+ Gold/Platinum Case Mid-tower with decent airflow Full-tower or high-airflow mid-tower with advanced cooling support Cooling Stock cooler or budget air cooler High-end air cooler or 240mm/360mm AIO liquid cooler Choosing the Right CPU, GPU, and RAM
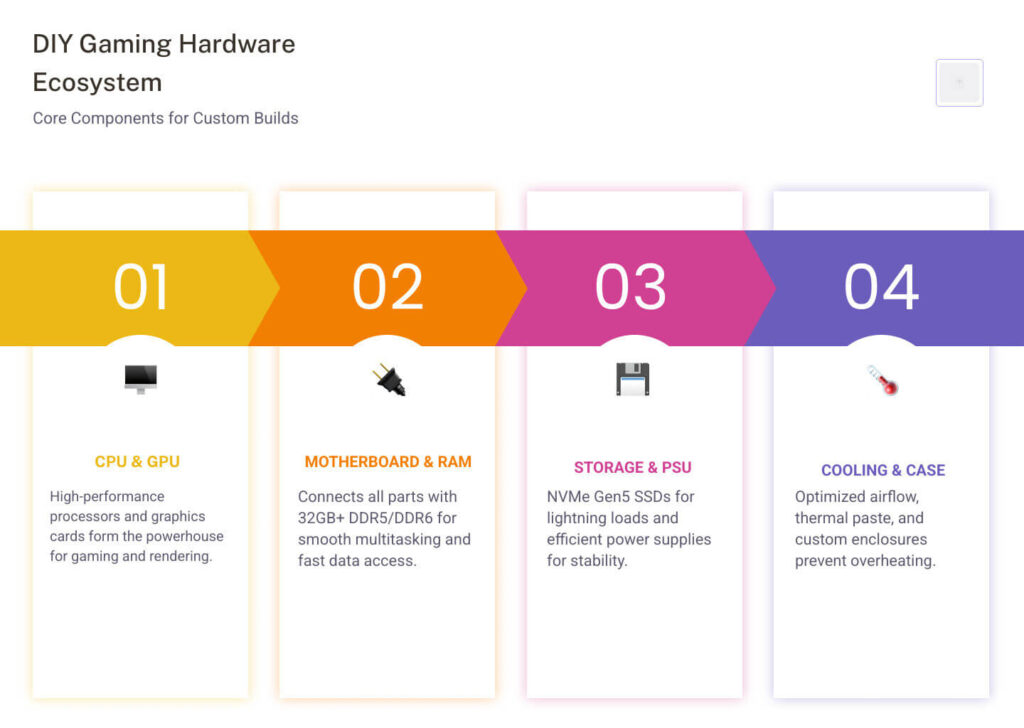
The core of any gaming PC lies in its CPU (Central Processing Unit), GPU (Graphics Processing Unit), and RAM (Random Access Memory). These three components dictate your system’s overall performance.
For the CPU, consider your primary use case. For pure gaming, a powerful mid-range processor from Intel or AMD often provides excellent value, as modern games are increasingly GPU-bound. However, if you plan to stream, edit videos, or run complex simulations, investing in a higher core-count CPU will be beneficial. Always ensure your chosen CPU is compatible with your motherboard’s socket (e.g., LGA 1700 for Intel, AM5 for AMD).
The GPU is arguably the most critical component for gaming performance. It renders the visuals you see on your screen. In April 2026, we have a wide array of options from NVIDIA’s GeForce RTX series and AMD’s Radeon RX series. When selecting a GPU, consider your monitor’s resolution and refresh rate. A 1080p monitor at 144Hz will require less graphical horsepower than a 4K monitor at 120Hz. Be mindful of potential bottlenecks; pairing a high-end GPU with a significantly weaker CPU might lead to underperformance, as the CPU can’t feed data to the GPU fast enough.
RAM is crucial for multitasking and loading game assets quickly. While 16GB of RAM has been the minimum recommendation for gaming, 32GB is increasingly becoming the ideal for future-proofing your system, especially with the demanding nature of upcoming titles and background applications. In 2026, we’re seeing DDR5 and even early DDR6 modules becoming more prevalent. Ensure your chosen RAM speed and type are supported by your motherboard and CPU.
For storage, NVMe SSDs (Non-Volatile Memory Express Solid State Drives) are the standard for gaming, offering significantly faster boot times and game loading compared to traditional SATA SSDs or HDDs. PCIe Gen4 NVMe drives are common, but PCIe Gen5 drives are gaining traction, providing even more blistering speeds for those seeking the absolute fastest data access.
Finally, don’t overlook the Power Supply Unit (PSU). An efficient PSU (rated 80+ Gold or higher) with sufficient wattage is vital for stable operation. Always check the recommended wattage for your chosen CPU and GPU combination and add a buffer for future upgrades.
Step-by-Step Assembly Instructions
Building a PC might seem daunting, but it’s a methodical process. Here’s a simplified overview:
- Preparation: Clear a spacious, well-lit workspace. Gather your tools: primarily a Phillips head screwdriver. Consider an anti-static wrist strap to prevent electrostatic discharge, which can damage components.
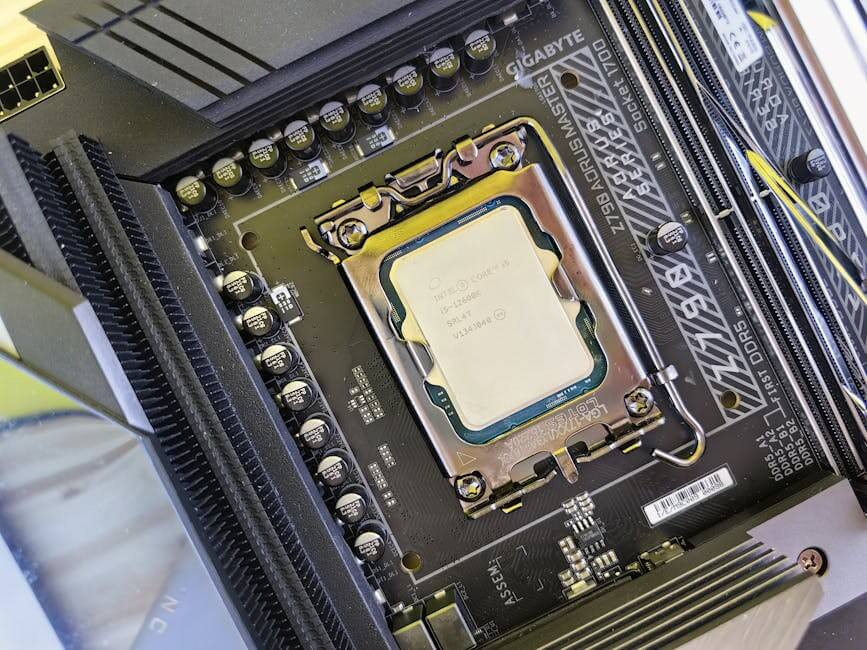
- Motherboard and CPU: Carefully open the CPU socket lever on your motherboard. Align the CPU with the socket, matching the “golden triangle” or notches, and gently drop it in. Do not force it. Close the lever to secure the CPU.
- CPU Cooler: Apply a small pea-sized dot of thermal paste to the center of the CPU (unless your cooler comes with pre-applied paste). Mount your CPU cooler according to its instructions, ensuring even pressure.
- RAM Installation: Open the clips on the RAM slots. Align the RAM sticks with the notches in the slots and press firmly on both ends until the clips snap into place. Refer to your motherboard manual for the correct slots for dual-channel memory.
- Motherboard Installation: Install the I/O shield into your case’s rear opening. Then, carefully lower the motherboard into the case, aligning it with the standoffs. Secure it with screws.
- Power Supply Unit (PSU): Mount the PSU in its designated bay, usually at the bottom of the case. Ensure the fan faces the correct direction (typically downwards if there’s a vent, or upwards if not).
- Storage: Install your NVMe SSDs directly onto the motherboard’s M.2 slots. If you have 2.5-inch SATA SSDs or 3.5-inch HDDs, mount them in the drive bays and connect SATA data and power cables.
- Graphics Card (GPU): Open the PCIe slot clip on the motherboard. Align the GPU with the top PCIe x16 slot and press it firmly until it clicks into place. Secure it with a screw to the case. Connect the required PCIe power cables from the PSU.
- Case Fans and Front Panel Connectors: Install any additional case fans. Connect all front panel connectors (power button, reset button, USB ports, audio jacks) to the motherboard. This step can be fiddly; consult your motherboard manual.
- Cable Management: This is crucial for aesthetics and airflow. Route cables neatly behind the motherboard tray, using zip ties or Velcro straps.
- Initial Power On & BIOS: Connect your monitor, keyboard, and mouse. Power on the system. If everything is connected correctly, you should see the BIOS (Basic Input/Output System) screen. Here, enable XMP (Extreme Memory Profile) for your RAM to run at its advertised speeds and check boot order.
- Operating System & Drivers: Install your preferred operating system (e.g., Windows 11). Once installed, download and install the latest drivers for your motherboard, GPU, and other peripherals from the manufacturers’ websites.
This detailed process, while requiring patience, offers immense rewards in terms of performance and customization.
Handhelds and Retro Consoles: The Power of Single-Board Computers
Beyond the traditional PC, the DIY spirit thrives in the realm of portable gaming and retro emulation. Single-board computers (SBCs) like the Raspberry Pi have revolutionized this space, allowing enthusiasts to craft their own handheld consoles, arcade cabinets, and dedicated retro gaming machines.
The versatility of SBCs, particularly the Raspberry Pi series, makes them ideal for these projects. Models like the Raspberry Pi 4 and the more compact Raspberry Pi Zero 2 W offer sufficient processing power to emulate a wide range of classic consoles. Coupled with specialized software like RetroPie or EmulationStation, these tiny computers transform into powerful retro gaming hubs. Projects like the PiGRRL 2 demonstrate how custom gamepad PCBs, integrated screens, and efficient battery management can lead to a fully functional, pocket-sized gaming device.
Essential Components for DIY Tech and Gaming Hardware
For building custom handhelds or retro consoles, several key components are indispensable:
- Single-Board Computer (SBC): The brain of your device. The Raspberry Pi 4 is a popular choice for its balance of power and connectivity, while the Raspberry Pi Zero 2 W is favored for ultra-compact builds due to its smaller footprint.
- IPS Displays: High-quality IPS (In-Plane Switching) screens are crucial for vibrant colors and wide viewing angles, enhancing the gaming experience. Sizes typically range from 2.8 inches for compact handhelds to 7 inches for larger portable units.
- LiPo Batteries & Power Management: Lithium Polymer (LiPo) batteries provide the necessary portable power. Solutions like the PiSugar 2 Pro, with capacities up to 5000mAh, can offer several hours of gameplay, though actual duration varies significantly with load and screen brightness. These often include integrated charging and power management features.
- Tactile Buttons & Joysticks: Authentic gaming feel comes from quality input devices. Tactile buttons, D-pads, and microswitch joysticks are often sourced from arcade parts suppliers or custom-designed for 3D-printed enclosures.
- 3D-Printed Enclosures: A 3D printer is an invaluable tool for creating custom cases that perfectly house all your components, offering both protection and personalization. Many community projects provide STL files for popular designs.
- Audio Amplifiers & Speakers: For an immersive experience, a small audio amplifier (like the PAM8302) paired with compact speakers or a headphone jack ensures crisp sound.
Installing and Configuring Emulation Software
Once your hardware is assembled, the software brings it to life. RetroPie is a highly recommended emulation operating system for Raspberry Pi.
- MicroSD Card Flashing: Download the RetroPie image for your specific Raspberry Pi model. Use a tool like balenaEtcher to flash the image onto a high-quality microSD card (Class 10 or higher, 64GB recommended for a good game library).
- Initial Boot & Setup: Insert the microSD card into your Raspberry Pi and power it on. RetroPie will boot into EmulationStation, its graphical front-end.
- Controller Mapping: The first step is to configure your game controller. Follow the on-screen prompts to map all buttons, D-pad, and joysticks.
- Wi-Fi Setup: Connect your device to Wi-Fi through the RetroPie configuration menu to enable online features, updates, and easier file transfer.
- Transferring ROMs: Game ROMs (Read-Only Memory files) are the digital copies of classic games. You can transfer them via a USB drive (RetroPie automatically creates folders for each system) or via SFTP (Secure File Transfer Protocol) if you enable SSH access in the RetroPie settings. Remember to only use ROMs for games you legally own.
- BIOS Files: Some emulators, particularly for more advanced systems like PlayStation 1, require specific BIOS files to function correctly. These files must be legally sourced and placed in the appropriate BIOS folder within RetroPie.
- Performance Overclocking: For more demanding emulated systems, you can safely overclock your Raspberry Pi through the RetroPie settings or the
raspi-configutility to gain a performance boost.
Advanced DIY Projects: From VR Trackers to Custom Controllers
The DIY tech and gaming hardware scene extends far beyond traditional PCs and retro consoles, delving into innovative peripherals and immersive experiences. Projects like SlimeVR, PiKVM, and custom arcade fightsticks showcase the incredible creativity and technical prowess within the maker community. These advanced endeavors often require a deeper understanding of electronics, soldering, and sometimes even 3D modeling. If you’re looking for inspiration for Creative DIY gaming hardware, these projects offer exciting challenges.
Building Full-Body VR Trackers
Full-body tracking in virtual reality significantly enhances immersion, allowing your real-world movements to be accurately mirrored by your in-game avatar. Commercial solutions can be expensive, but projects like SlimeVR offer an open-source, DIY alternative.
The core of SlimeVR trackers involves Inertial Measurement Units (IMUs) and microcontrollers. Popular choices include the Wemos D1 Mini (an ESP8266-based microcontroller) paired with IMU sensors like the BNO085 (though these are becoming harder to source) or the newer ICM-45686. The challenge lies in accurately capturing motion data and transmitting it wirelessly to a PC running the SlimeVR server software.
Key considerations for building SlimeVR trackers:
- PCB-based Builds: The SlimeVR community strongly advocates for PCB (Printed Circuit Board) based builds over wired ones. PCBs offer greater reliability, reduce the risk of wire fatigue and short circuits, and simplify assembly.
- IMU Drift: A common issue with IMUs is “drift,” where the sensor’s reported orientation slowly deviates from reality. Choosing quality sensors and ensuring proper firmware calibration are essential to minimize this.
- 3D-Printed Cases: Custom 3D-printed cases are used to house the electronics, providing protection and attachment points for straps. Many community-designed cases are available, often optimized for specific PCBs and components.
- Firmware and Software: Flashing the correct SlimeVR firmware to your microcontrollers and setting up the SlimeVR server on your PC are critical steps. The server aggregates data from all trackers and translates it into a format usable by VR applications.
Another advanced project, PiKVM, allows you to build your own KVM-over-IP solution using a Raspberry Pi. This enables remote control of any computer, including its BIOS, making it invaluable for server management or even remote gaming PC control. The PiKVM V3 HAT, for example, offers a modular solution for Raspberry Pi 4, providing features like FullHD 60Hz H.264/MJPEG video up to 1080p 60fps with low idle power consumption.
Custom Arcade and Fightstick Assembly
For fighting game enthusiasts or retro arcade lovers, building a custom arcade fightstick is a rewarding project. These controllers offer precision and durability unmatched by standard gamepads.
Essential components and steps:
- Microcontroller: Microcontrollers like the Adafruit KB2040 (based on the RP2040 chip) are popular choices due to their compatibility and the excellent GP2040-CE firmware. This firmware allows for multi-platform compatibility across PC, Mac, Linux, Raspberry Pi, and even consoles like Switch, PlayStation, and Xbox.
- Joystick and Buttons: High-quality arcade components, such as Sanwa-style buttons and microswitch joysticks, are preferred for their responsiveness and tactile feedback. These are typically 30mm diameter for buttons and a standard arcade joystick with 4 snap microswitches for 8-way control.
- Customization: Beyond basic functionality, DIY fightsticks can incorporate features like NeoPixel RGB lighting for customizable visual effects and small OLED displays for on-board diagnostics or game information.
- Enclosure: A robust enclosure, often 3D-printed or made from laser-cut acrylic, houses all the components, providing a sturdy and ergonomic base for intense gaming sessions.
- Wiring: The wiring involves connecting buttons and the joystick to the microcontroller’s GPIO pins. This requires careful soldering and attention to detail to ensure all inputs are correctly registered.
These advanced projects demonstrate the depth and breadth of the DIY tech and gaming hardware community, pushing the boundaries of what’s possible with readily available components and a bit of ingenuity.
Sourcing and Skills for DIY Tech and Gaming Hardware
Embarking on DIY tech and gaming projects requires not only a vision but also the practical means to bring it to life. This involves knowing where to source components affordably and developing the necessary technical skills. For a wealth of general DIY gaming hardware resources, including component guides and project showcases, exploring maker communities and specialized marketplaces is highly recommended.
Essential Tools and Technical Skills
While specific projects demand unique tools, a core set of equipment and skills will serve you well across most DIY tech endeavors:
- Soldering Station: Essential for connecting electronic components, especially for custom PCBs, wiring, and repairs. A good soldering iron with adjustable temperature, various tips, and quality solder is a must.
- 3D Printer: A game-changer for creating custom enclosures, brackets, and unique parts. Even an entry-level FDM printer can open up a world of possibilities.
- Multimeter: Indispensable for troubleshooting circuits, checking continuity, voltage, and current.
- Wire Strippers & Cutters: For preparing wires for soldering or crimping.
- Basic Hand Tools: Screwdrivers (Phillips, flathead), pliers, tweezers, and a utility knife.
- CAD Design Software: Familiarity with software like Fusion 360 or FreeCAD allows you to design your own 3D printable parts.
- Firmware Flashing: Understanding how to flash firmware onto microcontrollers (e.g., using Arduino IDE, esptool, or Raspberry Pi Imager) is crucial for programming your hardware.
- Circuit Testing & Prototyping: Breadboards and jumper wires are excellent for testing circuit designs before making permanent connections.
Beyond tools, developing skills like problem-solving, attention to detail, and patience will be your greatest assets. The DIY journey is as much about learning as it is about building.
For sourcing components, marketplaces like Tindie offer unique, often prototype-level, hardware directly from independent makers. You can find specialized PCBs, custom modules, and niche accessories not available in mainstream retail. For larger components like barebones gaming laptop kits, which allow you to supply your own RAM, SSD, and OS, some specialized retailers offer powerful options with premium pre-installed CPUs, GPUs, and displays. These kits provide a middle ground between a full DIY PC build and a pre-built laptop, offering significant customization potential.
Future-Proofing Your DIY Tech and Gaming Hardware
One of the significant advantages of DIY builds is the ability to future-proof your setup, extending its lifespan and relevance in the rapidly evolving tech landscape of April 2026.
- Modular Components: Design your systems with modularity in mind. For a gaming PC, choose a motherboard with extra RAM slots, multiple M.2 NVMe slots, and sufficient PCIe lanes for future expansion.
- Socket Longevity: When selecting a CPU and motherboard, research the expected lifespan of the platform’s socket. AMD’s AM5 platform, for instance, has committed to supporting new CPUs for several years, offering a clear upgrade path.
- Excess PSU Wattage: Invest in a power supply with more wattage than your current components strictly require. This provides headroom for future, more power-hungry GPUs or CPUs without needing a PSU upgrade.
- Expandable Storage: Ensure your system has room for additional storage drives, whether more NVMe SSDs or larger capacity HDDs, as game sizes continue to grow.
- Firmware Updates: Regularly check for and apply firmware updates for your motherboard, GPU, and other components. These often bring performance improvements, bug fixes, and compatibility enhancements.
- Hardware Scalability: For projects like Raspberry Pi handhelds, consider designing enclosures that can accommodate slightly larger batteries or screens if you anticipate future upgrades.
By adopting these strategies, your DIY tech and gaming hardware won’t just be a one-off build but a dynamic platform capable of evolving with your needs and technological advancements.
Frequently Asked Questions about DIY Gaming Hardware
We understand that diving into DIY tech can spark many questions. Here, we address some of the most common inquiries about building your own gaming hardware.
What are the pros and cons of building vs. buying pre-made gaming laptops or barebones kits?
The decision to build or buy is a common dilemma for many aspiring gamers and tech enthusiasts. Each approach has its distinct advantages and disadvantages:
Building from Scratch (PC or Laptop with Desktop Parts):
- Pros:Unparalleled Customization: You choose every component, tailoring performance, aesthetics, and features precisely to your needs and budget.
- Cost Savings: Often, building a PC offers better price-to-performance value than a similarly specced pre-built system.
- Upgradability: DIY systems are inherently more modular and easier to upgrade component by component, extending their lifespan.
- Learning Experience: Provides a deep understanding of hardware and troubleshooting, fostering technical literacy.
- Sense of Accomplishment: The satisfaction of creating your own powerful machine.
- Cons:Time Commitment: Research, sourcing, assembly, and software configuration take time.
- Warranty Complexity: Individual component warranties replace a single system warranty, potentially complicating returns.
- Troubleshooting: If issues arise, diagnosing them falls entirely on you.
- No Technical Support: You are your own tech support.
Buying Pre-made Gaming Laptops or Barebones Kits:
- Pros:Convenience: Ready to use out of the box (pre-built) or requires minimal assembly (barebones).
- System Warranty: A single warranty covers the entire system.
- Technical Support: Access to manufacturer support for issues.
- Portability (Laptops): Designed for on-the-go gaming.
- Optimized Design (Pre-built): Manufacturers often optimize cooling and component integration.
- Cons:Limited Customization: Pre-builts offer minimal, if any, customization. Barebones kits allow RAM, SSD, and OS choices but not core components.
- Higher Cost: Often a “convenience premium” is paid, resulting in lower price-to-performance ratio.
- Limited Upgradability: Especially for laptops, upgrades are often restricted to RAM and storage.
- Bloatware: Pre-builts often come with unnecessary software.
The choice depends on your budget, technical comfort level, and desire for customization versus convenience.
How much does it cost to build entry-level vs. high-end DIY gaming hardware?
The cost of DIY gaming hardware varies wildly depending on the type of project and desired performance.
- DIY Gaming PCs:
- Entry-Level ($800-$1000): This budget typically allows for a system capable of playing most modern games at 1080p resolution with decent frame rates. It will feature a mid-range CPU (e.g., Ryzen 5, Core i5), a mainstream GPU (e.g., RTX 4060, RX 7700 XT), 16GB of DDR4 RAM, and a 1TB NVMe SSD.
- High-End ($2000+): At this tier, you’re looking at top-tier performance for 1440p or 4K gaming at high refresh rates. Components would include high-end CPUs (e.g., Ryzen 9, Core i9), flagship GPUs (e.g., RTX 4080/4090, RX 7900 XTX), 32GB+ of DDR5/DDR6 RAM, and multiple high-capacity PCIe Gen5 NVMe SSDs.
- These figures represent component costs. Additional expenses might include a monitor, keyboard, mouse, and operating system license.
- DIY Retro Consoles (Raspberry Pi-based):
- Basic ($50-$100): A Raspberry Pi Zero 2 W, a cheap case, a micro SD card, and a basic USB controller can get you started with simple retro emulation.
- Advanced Handhelds ($150-$300+): Projects like the PiGRRL 2 or custom handhelds involve a Raspberry Pi 4, a quality IPS screen, custom PCBs, LiPo batteries, 3D-printed cases, and higher-quality buttons. The cost can increase significantly with premium components and specialized tools.
- Advanced DIY Peripherals (VR Trackers, Fightsticks):
- SlimeVR Trackers ($100-$200 per set): The cost depends on the number of trackers, type of IMU sensors, and whether you source components individually or buy a kit.
- Custom Fightsticks ($100-$300+): This varies based on the quality of the joystick and buttons (Sanwa vs. generic), the microcontroller used, and whether you add features like RGB lighting or OLED displays.
While DIY can offer long-term savings through upgradability, it’s important to factor in the initial cost of tools and the potential for unexpected expenses during the build process.
Are there legal considerations for emulation and ROMs in DIY retro consoles?
Yes, there are significant legal considerations surrounding emulation and ROMs, primarily concerning copyright law.
- Emulators are Generally Legal: Emulation software itself (like RetroPie, EmulationStation, MAME) is generally considered legal. These programs are designed to mimic the hardware of older systems and do not contain proprietary code from the original consoles.
- ROMs and BIOS Files are Problematic: The legal gray area, and often outright illegality, comes with game ROMs (digital copies of games) and system BIOS files. These are typically copyrighted material owned by the original game developers and console manufacturers.
- Ownership: Legally, you are generally allowed to create a backup copy (ROM) of a game you physically own. However, distributing these ROMs or downloading them from the internet, even if you own the original game, is often illegal, as it constitutes copyright infringement.
- Distribution: Websites that host and distribute ROMs are frequently targeted by copyright holders and are often operating illegally.
- BIOS Files: Many emulators, especially for more complex systems, require a copy of the original console’s BIOS (Basic Input/Output System) to function. Like ROMs, these are copyrighted firmware, and obtaining them from online sources is typically illegal. The only truly legal way to acquire a BIOS file is to extract it from a console you own, which requires specialized hardware and technical expertise.
- Fair Use: While “fair use” provisions exist in copyright law, their application to downloading and playing ROMs is highly debated and rarely holds up in court for personal use.
- Open-Source vs. Proprietary: The open-source nature of many emulators does not extend to the copyrighted games or BIOS files they run.
In summary, while building a DIY retro console is a fun and educational project, obtaining game ROMs and BIOS files legally remains a significant challenge. We advise users to educate themselves on copyright laws and to act responsibly.
Conclusion
The world of DIY tech and gaming hardware in April 2026 is a vibrant and ever-evolving landscape. From meticulously assembling a high-performance gaming PC to crafting a nostalgic handheld console or even venturing into cutting-edge VR peripherals, the opportunities for customization and innovation are boundless. This journey offers not only the tangible reward of a personalized setup but also the invaluable experience of technical literacy and problem-solving.
As we’ve explored, building your own hardware fosters a deep connection with technology, moving beyond passive consumption to active creation. It’s about optimizing for your specific needs, learning new skills, and joining a passionate global community of makers. Whether you’re seeking peak performance, unique aesthetics, or the joy of retro gaming, the DIY path empowers you to achieve it.
The future of DIY gaming is bright, driven by accessible components, open-source software, and the collaborative spirit of the maker movement. Embrace the challenge, enjoy the process, and build the gaming experience you’ve always dreamed of. For those ready to explore the next level of personalized gaming and tech, your journey into custom hardware is just beginning.